
Key Takeaways
Tenant walk-through inspections help document the property’s condition before move-in and after move-out.
A checklist, photos, videos, lease documents, and repair notes help prevent overlooked details.
Landlords should inspect the exterior, interior, safety items, plumbing fixtures, appliances, windows, and doors.
A written inspection report gives both the landlord and tenant a record they can reference during the lease.
Rental properties are great for supplementing your income and building your wealth over time. However, getting a property leased isn’t as straightforward as most investors would assume. Landlords have to clean, repair, and advertise the rental. Then, they need to screen applicants, draft a lease agreement, and onboard their chosen tenants.
These types of inspections are meant to protect both the landlord and the tenant. Renters can take into account any existing issues, and landlords can ensure tenants understand their maintenance responsibilities. All in all, these inspections are great for starting a tenancy on the right foot.
Even if you’re not legally required to conduct a tenant walk-through inspection, it’s greatly advised to schedule one before tenants move in and another after they move out. This can save you from a lot of headaches in the long run.
Want to know how to conduct efficient walk-through inspections? Then keep reading! In this guide, the experts at Ravago Group Properties will share our best tips and tricks.
Step-By-Step Guide to Conducting Effective Tenant Walk-Through Inspections
Walk-through inspections aren’t very different from a regular property inspection. The only difference is that you’ll have company.
The end goal of a walk-through inspection is to show tenants the current condition of the property and point out any existing issues or damages they should be aware of. Additionally, move-out inspections are meant to assess the condition of the unit and make deductions.

If you’ve never conducted a tenant walk-through inspection before, don’t worry! Here’s a comprehensive step-by-step guide you can follow:
1. Prepare for the Inspection
You should never walk into a property inspection without a plan, especially if you’re the one selling or renting the property. If you come unprepared, tenants will notice and may reconsider signing the lease altogether.
Make sure you have all the documents you might need, like the lease, previous inspection reports, and an inspection checklist. Our guide on getting your property ready to rent can also help with the larger turnover process.
Bring basic tools, like a flashlight, a screwdriver, and anything else that may come in handy. If you’re nervous or want to make sure you’re doing it right, consider doing a practice run.
You can do this by simply walking through the property and speaking as if you were showing it to someone else. This way, you’ll already know what you’re doing when tenants show up.
2. Coordinate With Tenants
This may seem like a given, but you should coordinate the time and date of the inspection with tenants, rather than just telling them when the inspection will happen. This helps you foster a better, more cooperative landlord-tenant relationship and start the tenancy on the right foot.
3. Create an Inspection Checklist
Inspecting a property can be a time-consuming process, so it’s not uncommon for some things to fall through the cracks. A great way to avoid this is by creating an inspection checklist.
This can be as simple or as complex as you want, but it should include all the areas you want to show to tenants, from a list of rooms to minor details, like electrical outlets, plumbing fixtures, and existing scratches.
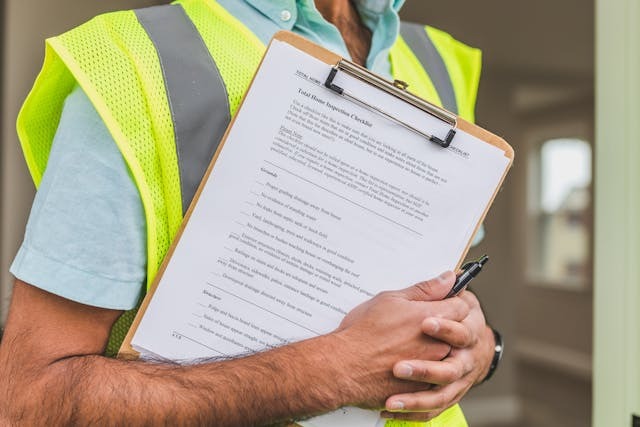
This way, you can ensure nothing is overlooked during the inspection. If you are also updating lease language, review our article on rental agreement essentials so maintenance responsibilities and inspection expectations are clear.
4. Inspect the Exterior of the Property
The exterior of the property is as important as its interior. So, it’s important to pay attention to this during the inspection. Make sure to assess the foundation of the property if applicable, siding, windows, doors, and landscaping.
Point out and record any visible damage, such as cracks, leaks, or normal signs of wear and tear. Finally, make sure to keep an eye out for signs of water damage, mold, or pests.
5. Carefully Inspect the Interior
You should inspect the interior of the property very carefully. This is where tenants will spend most of their time and, thus, where it’s more common to find tenant-caused damage and signs of wear and tear.
Here are some things to keep in mind when inspecting the interior of your rental:
Test light switches, outlets, and appliances to show tenants everything is working correctly.
Inspect cabinets, closets, and storage spaces.
Keep an eye out for leaks, mold, water damage, and any other health hazards.
Test the carbon monoxide and smoke detectors to show tenants they’re working.
Inspect bathroom fixtures such as sinks, toilets, showers, bathtubs, and faucets. Test for leaks, water pressure, and drainage issues.
Test all ventilation systems, exhaust fans, and mirrors to ensure they’re in working order.
Open all windows and doors to show tenants they open and lock correctly.
Nevada landlords should also stay aware of habitability duties. The Civil Law Self-Help Center explains common habitability and essential-services issues that can affect rental housing in Nevada.
6. Document Everything
You should document any issues you encounter during the inspection, whether it’s a small scratch you hadn’t noticed before or a major repair. Make sure to write it down and take photos and videos if possible. This ensures that you have a clear picture of the property’s condition and shortcomings.

It also helps ensure deductions are made fairly at the end of the lease. For more context on the difference between routine use and damage, see our guide to normal wear and tear.
7. Create an Inspection Report
All your findings should be incorporated into an inspection report. The goal of this document is to provide a summary of the property’s condition that both you and your tenants can reference at different points in the lease.
A comprehensive inspection report can come in handy when making deductions or asking tenants to restore the unit to its original condition.
8. Make Repairs
A thorough walk-through inspection may uncover issues you weren’t aware of. Typically, it’s expected for landlords to address these problems before tenants move in. But some landlords allow tenants to make the repairs themselves if they’re small enough, in exchange for a small rent discount.
Either way, it’s important to oversee the entire process to ensure repairs are made on time and that the condition of your property doesn’t deteriorate.
Bottom Line
Tenant walk-through inspections are a crucial part of the leasing process. They give tenants and landlords the opportunity to inspect the unit, assess its condition, and unveil hidden issues. By following the tips outlined above, you’ll be able to conduct tenant walk-through inspections more efficiently and set yourself up for success.
Need help inspecting your Nevada rental? Contact Ravago Group Properties!